Tagging Objects on the Schematic
To see the current list of tags for an object, move the mouse over the
object in the Schematic and its tags, if any, will be displayed alongside
the object's name in the status bar at the bottom. For
example, move the mouse over South City and the status bar will display:
Demand Site "South City"; Tags: Municipal, Big City, South.
There are several different ways to add or remove tags from objects
on the Schematic. To
add or remove a tag from a single object, right click on the object and
choose "Add Tag to Object" or "Remove Tag from Object"
from the popup menu. To
quickly add or remove a tag from several different objects, click the
plus ( ) or minus (
 ) icons on the Tag
Toolbar (located below the list of background layers to the left
of the Schematic), select the tag to add or remove, then click on every
object for which you want to add or remove that tag. When
you are done tagging, click the or icon
again, or hit the Escape key, to exit tag mode. Remember
that you can see what tags an object currently has by moving the mouse
over it and looking in the status bar at the bottom. As
you click an object to add a tag to it, the status bar will instantly
update to indicate that the object now has the new tag.
) icons on the Tag
Toolbar (located below the list of background layers to the left
of the Schematic), select the tag to add or remove, then click on every
object for which you want to add or remove that tag. When
you are done tagging, click the or icon
again, or hit the Escape key, to exit tag mode. Remember
that you can see what tags an object currently has by moving the mouse
over it and looking in the status bar at the bottom. As
you click an object to add a tag to it, the status bar will instantly
update to indicate that the object now has the new tag.
When you add a tag to a Demand Site or Catchment, every descendent of
that Demand Site or Catchment will also get the same tag. For
example, tagging South City will also tag South City\Single family, South
City\Multi family, South City\Single family\Showers, South City\Singe
family\Washing, etc. The
same is true for removing a tag from a Demand Site or Catchment -- it
will also be removed from all descendents. An
exception is for rivers -- if you add (or remove) a tag from a river,
such as Weaping River or Blue River, it will NOT add (or remove) the tag
to the nodes on that river.
Important: Because WEAP can
use tags to group and subtotal results, do
not assign more than one tag from the same category to an object. If
you do, you might double count the results. For
example, if you assigned tags "South" and "Central"
to Demand Site South City, both of which are in the same category (Location),
South City's results would be counted in both the South and the Central
tag results, if you chose to view results by tag. WEAP
will check for this situation and warn you in the Results View.
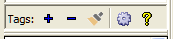
Tag Toolbar
To copy the tags from one object to other objects, you can use the Tag Painter, which is similar to the
"Format Painter" in Microsoft Word. Click
the tag painter icon ( ) in the tag toolbar, click on the
object whose tags you want to copy, then click on every object for which
you want to add the tags. When
you are done painting, click the paint brush icon again, or hit the Escape
key, to exit paint mode. You
can also right click on an object and choose "Tag Painter" from
the menu.
) in the tag toolbar, click on the
object whose tags you want to copy, then click on every object for which
you want to add the tags. When
you are done painting, click the paint brush icon again, or hit the Escape
key, to exit paint mode. You
can also right click on an object and choose "Tag Painter" from
the menu.
You can add or remove a tag from a group of objects all at once. To
select multiple objects, hold down the Alt key as you click and drag on
the main schematic to draw a rectangular grouping box around the intended
objects. (To create a non-rectangular shape, hold down both the Control
and Alt keys when you click. Thereafter,
each click will create a new point of the shape. Double
click to finish it.) When
you release the mouse button, a red box will appear. Right click inside
this red box and select "Add Tag to All Objects in Selected Group"
or "Remove Tag from All Objects in Selected Group." Choose
the tag to add or remove from objects in the group inside the red box.
Note: If the red box encompasses any objects that are temporarily
hidden, they will NOT be tagged. Hit
the Escape key to cancel without tagging.
The Add, Remove and Paint options are also available on the Main Menu
Tags menu. This
menu also includes one final method for tagging objects. The
menu option Tags, Export to Excel
can be used to make a quick report of all tags on objects . This
is also an easy way to edit tags for many objects at once. Edit
the list in Excel, then choose the menu option Tags: Import
from Excel to read in the edited list. When
you Import tags from Excel, WEAP will add the tags listed in the spreadsheet
to the list of tags already existing for an object. (And
a tag added to a Demand Site or Catchment will also be added to all of
its descendents.) It
will not remove any tags from an object unless the list of tags read from
Excel is blank. In
this case, WEAP will remove all tags from the object. You
can also use this method to create new tags -- any tag imported from Excel
that does not already exist will be created, with Color = White and Category
= Uncategorized.
To edit the master list of tags, click the gear icon ( ) to access the Manage Tags screen,
or the main menu option: Tags, Manage Tags...
) to access the Manage Tags screen,
or the main menu option: Tags, Manage Tags...
See also:
Tags (Overview), Manage
Tags, Tagging Branches, Filtering,
Using Tags to Filter, Group and Subtotal Results,
Scenario Explorer, Tag
API
Menu Option:
Tags